Showing posts with label diy. Show all posts

Friday, September 14, 2012

Diy cloth doubler

I recently made the switch to cloth diapers. After many attempts at potty training boy number one I wanted to make boy number two easier. And I had read different studies about how using cloth diapers make the transition easier. That and the initial up front cost is steep, you can quickly get your months worth out of them. I got my diapers from Sunbaby diapers, worked out to about five bucks per diaper. And they are great, but the need a little extra for the night time. After reading a few blogs I decided to make a doubler. 
It's really very simple. You need microfiber cloths ( I got these from Walmart six of them for Five bucks.) You will also need some scrap fabric. The fabric I used was from the flannel receiving blankets I have never really used. They are much too small for the size of baby we tend to have in this house. 
You will take the micro cloths and fold them into thirds, laying them down on to the flannel, with the loose side against the flannel. Pin them into place and cut to size. 
Then all you need to do is sew them together. Sewing down the center first. You can just do 5 individual lines, or you can sew so you have one line. Sew down the center then with your needle down and your foot up rotate the fabric clockwise. And sew again, when ever you get to a corner simple pivot and keep going. You will end up with two sets of loose strings instead of ten. 

Be sure to keep the flannel side next to your baby. The microfiber will dry their butt up. I did these four in 30 min or so, not the best quality sewing but I figure they won't see the light of day much, and if all they are going to do is catch poop why spend a lot of time and energy making them look amazing? 

Monday, August 20, 2012

DIY coffee table

Well, we are in a small apartment and which makes having space almost impossible. And while I have a wonderful coffee table that I adore I don't really have the space for it. We will soon have a crawling baby and I wanted the extra space for that coming moment.
The coffee table I have is large, sturdy and very helpful. The top pulls apart to reveal a compartment to stash things. I enjoy it enough I don't wanna get rid of it, so when my little brother got married and they needed a coffee table I thought perfect they can use it!
So I told my brother and his new wife that they could take the coffee table, paint it stain it, they were just not allowed to get rid of it.
So I set out to make myself a new one. I had recently found some old spools in my parents back houses. So I got one and spray painted it. In the future I will do a base coat. I painted it grey, and it's a darker dull grey, where I would have loved a brighter crisp grey. Oh well live an learn. Also another freebie for you, buy the nicer spray paint it's worth the cost.
After I finished the spray painting, minus the top and bottom, I brought it home to my place (I was painting it at my parents place) I covered it with some batting and fabric, using a staple gun I secured the batting and fabric to the table, and tada!
I have a wonderful stable and small coffee table. All for about 10-15 bucks! Score!

Tuesday, August 14, 2012

Matchy Matchy!

Why buy, when you can DIY? I love being a mother of my two boys. I look forward to the tree forts, the canal searching, bug catching and over all boy-ness, and guess what? I will be right there in the thick of it. Lord be with our little girls, if we have any. I grew up as a tom-boy. I never enjoyed the barbie dolls and teapartys, honestly I avoided them at all cost. I was out in the dirt and mud, climbing trees, chasing animals. That was my childhood, so to have boys is like a chance to relive that all over. And I'm stoked.
One thing that I do not like about having baby boys, the femininity that we have infused into all things boy. I'm sorry when I dress my little 7 month old and still get the questions, "Boy? Or Girl?" Really? There is something wrong here.
So, I have the cute pastel bed sheets, because that is all they had at the store. Well recently I was wondering how hard it would be to make some sheets. I wanted to make a little super hero themed room. You can not have a super hero themed room with pastel sheets. That little super hero would be made fun of by all the other more manly super hero's that have non-pastel sheets.
So off to the internet I went. The tutorial was easy. I had this "ReaLLY?!?!?  That's It?!??!" Moment and Off the the store I went.
I picked out three types. I made a matching set for the boys room that has little whales on it. Its Fun, there were other ones that I liked more for little boys, but none of them were cheap enough for my "experiment." There other set that I got was one super man and one batman. I am going to make them for Christmas. Pretty excited about that.
Well, I cut the first set up, sewed, hemmed and sewed on elastic in one night, took me maybe an hour or two, not long at all. I was pretty excited.
And honestly? It was so very easy, I'm ashamed I did not try this two years ago with my first child. Granted, fabric in the little town I lived in was an easy double of what it is here, and why should I go buy fabric, when I was given sheets?
But I have made them, they are fun, they were easy and if you have access to a sewing machine and the basic sewing skills from your jr high home ec class- your golden!
For the how to Check out http://www.luvinthemommyhood.com/2010/05/crib-toddler-bed-sheet-tutorial-with.html
Here is the fun fabric! 
after I had added the corners and the hem
Now with the elastic 
Here is the toddler bed in use
and the crib sheet! 

Saturday, August 11, 2012

Apartment Sized fire pit


I'm a bit of a pyro. But I promise I only burn responsibly, most of the time anyways. And being a pyro I love fires, there is something so relaxing and fascinating about some simple contained flames.
Before we moved I was planning on putting a fire pit in our back yard, we worked with youth and I thought it would be so fun to have a fire with them late a night. Something I could put our kid to bed grab the baby mounter and go out to hang out. Well plans changed, but my desire for a fire pit did not.
Sadly though we live in an apartment complex and have a small balcony, I think my land lords would frown upon me digging a pit in the grassy area near by. So I gave up my fire pit dream, and filed it away for "when I have a house."
But that was before I found a how to make your own grill, and it struck me, if you can make a grill- why not a fire pit? So I set out to do just that.
Bit, low and behold, another pit fall. Do you know how pricey ceramic pots are? It was another buzz kill. I had hope to make a fire pit for cheap, if I wanted to spend upwards of 30 bucks I would buy one.
So I waited.
And my waiting finally paid off, I was shopping and found a whole bunch of pots for cheap, I picked up a nice sized one in black, with vines across the sides, for get this 12 bucks. Yep that's right 12 bucks. Score!
So the rest of it is easy, you only need sand and of course the burning objects.
I placed a piece of cardboard on the bottom along with a piece of newspaper, to keep the sand in the pot. Then thanks to a local sand pit, filled it to about three inches from the top with sand, for frrrrrrreeeeeeeee!
Then I got newspaper from my parents place along with the kindling from the floor of their wood chopping area.
I'm thinking my landlords will still not be thrilled, but don't worry too much I'll always do as Smokey says "burn responsibly."

Friday, July 27, 2012

And Lacey shorts!

After I finished the shirt project I still had lace. What to do, what to do? Where did all this lace come from well, I had gotten a dress that had lace on it, adjusting it to a cute white summer dress. Still needs a few tweaks, but over all it works. But it gave me lots of left over lace! Yah! So I decided to lengthen some shorts that I have.
This project is so easy it's crazy. You start at one edge, my shorts have a little slit so I started sewing at the slit. You simply sew the lace on one leg, trim and see on lace on the other leg.
In a matter of moments you have a cute pair of shorts, that are longer then the "see my butt?" shorts. Those are so great.

Lacey shirt

I recently acquired some shirts from my sister. They are cute, a little tight, but cute. So today I sat down to do something about that. Honestly the one shirt I started with would have been fine, but (and I swear I am not making this up)  the shirt must have been cut on the bias. It feels as if it is twisting around on my torso. I figured by adding some fabric to it I could give my skin some much needed space, and thus doing away with the annoying twisting feeling.
So, taking the shirt you cut one side off and the seam (I did one at a time, to help make it easier) lay your lace (or other fabric choice) on your fabric. And sew up one side. I did my lace edge showing, but you can hide it if you would like. Once you are done with one side repeat with the other side. And you have a fun shirt, with a little sex appeal and the bonus of a little more breathing room!

Sunday, July 8, 2012

Sock Bun, easy way.

Wow, it's been awhile. I have a feeling that blogging with be one of those things done more in the cold season, when I am locked in doors more often, then the summer when being outside is just too big a temptation! 
But here we are. And today I though I would share my take on the sock buns that you have seen on Pinterest. There are two main ways I have see, both starting with the sock, toe cut off and rolled on it's self to form a doughnut. 
The first way is to take your hair in a high pony tail. Then taking the sock and starting at the end of your pony tail you roll the hair around it. This was tricky. I have thin hair and while long it's not nearly enough to wrap around the sock evenly. And I usually end up with the white sock showing. Not attractive.
Then next option while easier tends to leave you with a tuft that looks as if it hovers above you head. you take the sock to the base of the pony tail. And then finding the center of your pony tail you spread your hair out evenly around the sock to cover it. Typically secured with another elastic. Then you have to figure out what o do with the left over pieces.
This is what I have done. And I really like it. 
Above is the supplies. Those twisting bobby pins are amazing. I bought the two longer ones for about six bucks and the three shorter ones for about seven. They claim to do the work of 20 pins and they do. they work very well. 
To start you will need to make a pony tail. It doesn't matter where you put it. I have done super high on my head, and at the nape of my neck. It all works.  
Slip the sock (again, it is a sock with the toe cut off and then rolled onto itself forming a doughnut) to the base of your pony tail. 
Then tease, tease and tease.  
Picking a spot to start you will begin to wrap the hair around the sock...
 Keep wrapping....
 Once you have the spaces secured you will then use the twist pins to secure. I have found that if you use a looser knit sock you can twist right into the sock. Making your bun a little more secure.
And This is the finished product. You can add hair accessories to your hearts desire. I would just not go toooo over board. After all the nice thing about this look is the simplicity. Enjoy!

Thursday, June 28, 2012

Midnight lighting

This morning was rough. Two needy children and a tired mommy, can lead to bad things. Thankfully when I find myself with one of those days I find some time to create.
Nothing can change a mood like making something.
So this morning, after I put one child down for a nap and and gave the other some food. I sat and made some lovely lights for my patio.
For this project you need some old cleaned out wine bottles. You can leave leave the labels on or take them off. Then using some thicker gauged wire you will need to wrap (the tighter the better) around the neck just under the lip of the bottle, make sure you leave a loop in order to hang your bottles up. Or you could also leave them as stand alone lamps. After you have prepared your lamps holder you will need to gently force in some lights. I like to collect lights after Christmas, cheap and lots available.
Here's a trick for getting the lights in the bottles. If you have four bottles form four groups of lights on your one string. Take the middle of one group fold in half and start to feed into the bottles. Make sure you leave some space between bottles so you can hang them up.
I'm hoping that my husband will be able to bring some large clear bottles so that I can make some bedside lamps!

Friday, May 25, 2012

Ah Fedora! In Fantastic neon!

I met a great friend today and we went walking at the mall. We are looking forward to when it's warmer so we can walk outside. Exercise is much more enjoyable outside, at least in my opinion. And then you also avoid the impulse buying tick.
I am normally quite good about the window shopping and not buying. But today, today I was weak. So I scummed to the buying bug. And I do not regret the purchase.
We walked by the children's place "sales" signs everywhere. In we went. I found two adorable little boy fedoras. So Cute. But more then I wanted to spend. What's that you said? Hats on sale for four bucks?!? Why yes, I do believe I will buy these two hats. And off I went to find one for me. Yes, I know that I have a small head. And with all the cute hats I was more thankful for my small head then I have been in awhile. I thought I could be thankful for having a small head when I had my two boys. Turns out "big" heads are more dominate. What's the point in having a small head? So I can buy and wear cute kid fedoras. But they were very girly. I wanted just a basic one. The best I could find was the one below. But for four bucks, how could I say no?
I got home, and upon studding it I realized that I can simply seam rip the bright yellow trim off the rim. I also took off the bow. I plan on gluing the bow to a barrette. Then I use it on hat and hair and...
This is the finished product. I really like it much better with out the trim around the brim. I now have a great hat that I can wrap ribbons around to change it. Attach flowers, barrettes, I also found out that I can use my headbands around it. The possibilities are endless! So excited! 
These are another purchase that I made. They are bright pink flats, but the picture doesn't do them any justice. They are Bright BRIGHT neon Pink. I just had to share my lovely shoe find.
The whole point of this is that if your patient, I waited alllll winter long to get these hats, it will pay off. And the other point is that with a little bit of work you can take something ho-hum to Hum-Yes! I'm looking forward to long fun times with my fedora and the shoes... the shoes are pretty distracting. 

Tuesday, May 15, 2012

LBD- blue not black

Have you ever attempted to find royal blue clothing? It's not really easy. Of course when you are not looking for it then you find it, but when you "Need" to find something that color you can't. I found Bright, topical blue and Navy blue, baby blue, green blue. But no royal blue. You might ask "Why are you trying to find Royal Blue?" Well let me tell you. My younger brother is getting married this summer. The bride and groom requested that we wear Royal blue. Happy to oblige, if I could I set out on my quest. 
I found a beautiful royal blue dress at a certain store (Old navy if you must know) and brought it home. triumphant in my quest, I proudly showed my find to my wonderful husband. He was indifferent. Honestly I was told that it looked like I was wearing a swath of royal blue fabric. Thought I could live with that, it was after all the elusive color I had looked for.
Sheepishly, I found myself back at the same store, with said dress. Returning it. I so seldom have the chance to buy clothing, I will not buy something that my husband doesn't like.
So off on the hunt I went, again. 
I had found directions months ago about how to make an infinity dress. But that was before budgets and baby number two. I forgot, like I so often do now days. I can thank Pinterest for reminding me. And a dear dear friend for pinning the pin.
The bottom of the post has a very helpful site to go to to make your own infinity dress. 
If you are anything but short you will need a butt load of fabric, I'm not joking. That, that picture is of five yards of very stretchy fabric. Tips for picking out fabric; look for a nice stretchy fabric, one with spandex in it, give the raw edges (in the store) a bit of a tug to make sure it won't unravel on you. Once you have spotted your prey, watch it through your camouflage of coupons while you wait for the "right" coupon. I found a 50% off coupon bringing this fabric down drastically! Thank goodness. 
This is the fabric laid out, you can't see the end of it, it just kept going and going down the hall way. This next part is such a pain in the butt.
You will need to cut the circle for your dress. A perfect circle out of slippery, slick, fabric. It can be done, just take your time and go SLOW! I used my tape measure that I stuck a pin through the hole of pinning the tape measure and fabric to the floor. Then using some chalk I made dashes to cut a straight line. 

When cutting the long straps, I recommend a yard stick. Helps to keep the fabric still and the line straight.
These are all the pieces, I have one circle skirt, one waistband and two very long straps. When you sew them together, trust me it will be easier to do the straps then the waist band. Much easier to manage. I ended up with a circle on my skirt (for my waist) much bigger then my actual waist, so I had to gather it into the waist band. I would recommend doing this project with a person who is good at math. I am not, I suck at math. Anything past the 2 grade my kids will be at the mercy of their father. Who is good at math. And if I had been patient I might have been able to avoid the gathering process. 
Also, my waist band was much thicker then the dress made by the other person who made it. But I found that the thicker waist band help to hide the bra. Good thing, yes.
Sew the straps on, then pin the waist band on and sew that on, but leave about half an inch on each side not sewn down to the fabric. Then you can sew your vertical seam, then sew it down to the dress. There was way too much seam ripping going on for my liking. The fabric was slippery and keep slipping around making it very difficult to sew. 
But perseverance paid off. Now I have a lovely royal blue dress that I will be able to wear in a variation of ways the only limit is my imagination!
Go and check out the site for an awesome diagram!  

http://knucklesalad.com/convertible-infinity-dress-how-it-almost-defeated-me-and-what-you-need-to-make-one/

Quick, in the nick of time, iPad headrest mount

A trip looming with a 23 month old and a 4 month old, you could say I'm a bit apprehensive. A year ago the 23 month old traveled well, but that was a year ago... who knows what this trip will be like. And horrors, I'm doing it solo. I'm either brave or out of my mind insane. We will find out which after the trip, or during. Five hours in a car...what can I do to keep at least one of my children happy?...? Well I have this great little device, an iPad, but no way to attach it to the back of a head rest. And have you priced out those things lately? Not cheap.
I am woman, I am resourceful. There must be some easy and simple solution that is cheap. I googled "diy iPad mounts." There were a few options that came up, but none of them "simple" and they all required purchasing things.
Hoping to use what I already had around the house, I set to thinking. And Thinking and thinking, and Thinking. And this is the solution I came up with. Granted it has not had a "test drive" (literally) but when I set the iPad in seemed to hold fairly well. Granted I had these items from one past project and a brother-in-law who gave me the shirt (it was much much to large for him.)
Are you ready for this all too simple project? All you need is a shirt (that is longer then your head rest-you want to be able to tie it) and a plate hanger. Yep that's it. I'm glad that I was able to think of this, because if I came across this on the internet (or Pinterest) I would be doing the V8 head slap. 
You simply cut the bottom of a large, x-large or xx-large shirt, about 6-8 inches or so. Enough to help balance and secure the weight of your device. 

Once you cut the strip, you will need to cut it apart, so that you have a strip of fabric instead of a tube. 
Next, you will go find your victim. A headrest of your choosing. Tie the strip of fabric around the headrest, loosely to start with. Take the plate hanger and slip it between headrest and the fabric. Now you can tighten the heck out of the fabric strip. Make sure you spread the fabric across as much of the headrest as possible. The more fabric touching the more friction involved, the less you have to worry about that very expensive piece of equipment. 
Then you take your device and using the plate holder just slip it into place. Now you have a very easy, inexpensive mount for the long and tedious trips you take with children. Happy traveling! 


Sunday, May 13, 2012

A Mother's day Gift

I love being a mother. Having kids is up there in my top 10 list. Yes it's a challenge some times and I would be lying if I say I have never thought about what my life was like before, and missed it. I'm a mother, not a saint. But then they do something sweet like my baby son smile ridiculously big just for me looking at him or my older boy coming with his arms outstretched and saying "Ug, Ug."
And just like that I forget all the turmoil and think, "Awww, I want ten more!"
One fantastic bonus about the kiddos is that I have some pretty awesome built in Mother's day gifts, or in this case Grandmother's gift. As long as I have a hand print or a picture of the boys I'm covered.
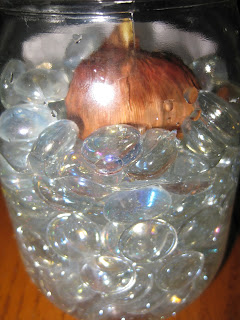
For this year's project you will need  a jar (I used mason jars- found them) some pretty glass rocks, two bulbs, picture (or paint for hand prints) and Mod Podge to paint the pictures to the jars. 
These jars were pretty dirty, so a quick trip through the dishwasher took care of that. You ask why didn't I simply wash them in the sink, by hand. Well, let me tell you. Where I have been able to deal with my deep fear of spiders, I can now kill them, I will still avoid thrusting myself-willingly- into Spider Web situations.  
Then Taking the pictures I mod-podged them on to the jars. I recommend using copy paper for this, or you will not be able to keep the photo paper on. You will just create a gift that will cause annoyance with the picture continually pealing away from the glass. "Thank you Thank you very much for the *ahem* wonderful gift." 
Next take your glass rocks and fill the glass vase half full, or half empty? Then pour some water over the rocks.  
Place the bulb on the rocks and then using the leftover rocks "stabilize" the bulb.  
And here is the finished project. Ready to bloom and bloom and bloom! If it stays watered that is! 

Monday, May 7, 2012

Take Two...

I sat down a few days ago and was going to make a trivet out of all the corks that my husband has been bringing home from his job. By warping wire around the middle I thought I could just coil them together, nope that doesn't work. I'll lay them flat and do a type of weaving with wire, nope that's even worse. Oh! I'll just...forget it! I sat down to be relaxed not to get annoyed and frustrated at a bunch of stupid corks! I put that project on hold and just watch tv instead.
Then late on Saturday night, as I should have been going to bed an idea popped into my head. You know how your brain is tired till your head hits the pillow then you have all those wonderful brilliant ideas come. That was where I was Saturday night, amazingly Sunday morning the idea was still in my head. So I set to work, keeping an eye on the time. I do after all still have church two boys to get ready and a husband to get up.
I sorted through the corks first and picked out all the same corks, won't do to have a mismatched trivet. Don't want things tipping down the road. I then heated up my wonderful glue gun and set to work. I stood at the counter keeping the hot tip and the cord away from my almost two year old. He is quite able to entertain himself and enjoys playing and doing his own thing- minus now where he is sitting in my lap watching me type and drinking lots of water (fun diaper to come.) But you still can't be to safe when heat is involved.
Standing the corks up I started to glue them together, going in a circular pattern. I just kept going and going and going.  
After a bit of time I ended up with the below project. 5 corks across in a hexagon shape. I enjoyed the random purple tops scattered in the trivet. Thinking that this will make a fun project later, possibly write a letter in the corks by using the purple tops. Will be tricky and time consuming and I will need many many more corks.  
Above is the almost finished project, missing something though. Hot glue is incredible and a great solution for simple projects, but it lacks a little permanency when dealing with some projects. This being one of them. 
Using some wire that I have around from previous craft obsessions I warped the corks twice and twisted the ends together. Giving the trivet a lot more stability and a nice touch of class. This step would have been much easier if I had simply waited for my lovely husband to help out. But patience is a work in progress for me and so there for I did it by myself.  
The gluing of this project was easy and you end up with such a fun look afterwards. I look forward to other projects that the corks will inspire! 

Sunday, May 6, 2012

By Starlight

I remember as a teen I bought some glow in the dark plastic stars. My cousin and I then preceded to cover my entire ceiling with them. Jumping up off the bed to stick them, moving chairs, supporting and balancing each other as we accomplished our task. We possibly had a little too much fun and wrote the name of my high school crush in the stars. Possibly. I loved falling asleep under them watching them slowly fade into the darkness of my bedroom while I dreamed by the starlight they left, so very briefly.
I moved out of my back bedroom that had been converted from my dad's old shop room. Making way for my brother who took over the room, but still the stars stayed. He made room for my husband and I to be able to land for a bit, and I was able to show my high school sweet heart proof of my crazy crush. We moved out of that little bedroom and my next brother took hold of it, and the stars remain.
Not for any sentimental reason, mainly because it was time consuming to place them up there, and it will be just as time consuming to remove them. So the stars will keep their nightly watch in the back bedroom and the sister next inline will be able to fall asleep by starlight. 
My son has develop a fond love of "stars" it's the first shape he can recognize and he gets very excited when he finds this shape. I borrowed a metal desk from my parents, to set a fish tank, and inside the drawer was one of the glow in the dark stars. Our boy was over joyed to find that little star. My sister was gracious to give me some of her old stars that she had taken off her ceiling, maybe those stars in the back bedroom won't be there much longer after all.
I rent. I will not take the time to stick a bunch of stars up to only remove in too short a time period, no matter how few they may be. But my son needs to sleep by star light! That's when I came up with this very simple but fun idea. 
All you need is some paper lanterns, above, and some glow in the dark stars, below. Along with a hot glue gun, also below.  
First thing I did was divide the stars up evenly so that I won't end up with one of those awkward looking 30 stars on this one, and 5 on that one. And the last thing I wanted to do was try and peel the stars off, that would lead to ripped lanterns, of which I do not wanna have to pay to replace them. These lanterns were a yard sale find, I paid one buck for three.
I focused mainly on the bottom with a few on the sides and none on the top of the lanterns. They hang above the crib so you don't see the top.

I now have the best of both worlds. Glow in the dark stars to watch at night AND they will not be a huge time steal-er project to take down- nice little plus hot glue sticks a lot better then the weird gummy stuff they give you.
I know it's hard to see the stars, turns out white on white is a tricky thing to see. But I stepped into the closet with the lanterns and my son to show him what they do. The stars looked lovely in their glow-y-ness, but I'm pretty sure the kid had no idea what I was doing. "Crazy women in the closet..."