Friday, May 25, 2012

Ah Fedora! In Fantastic neon!

I met a great friend today and we went walking at the mall. We are looking forward to when it's warmer so we can walk outside. Exercise is much more enjoyable outside, at least in my opinion. And then you also avoid the impulse buying tick.
I am normally quite good about the window shopping and not buying. But today, today I was weak. So I scummed to the buying bug. And I do not regret the purchase.
We walked by the children's place "sales" signs everywhere. In we went. I found two adorable little boy fedoras. So Cute. But more then I wanted to spend. What's that you said? Hats on sale for four bucks?!? Why yes, I do believe I will buy these two hats. And off I went to find one for me. Yes, I know that I have a small head. And with all the cute hats I was more thankful for my small head then I have been in awhile. I thought I could be thankful for having a small head when I had my two boys. Turns out "big" heads are more dominate. What's the point in having a small head? So I can buy and wear cute kid fedoras. But they were very girly. I wanted just a basic one. The best I could find was the one below. But for four bucks, how could I say no?
I got home, and upon studding it I realized that I can simply seam rip the bright yellow trim off the rim. I also took off the bow. I plan on gluing the bow to a barrette. Then I use it on hat and hair and...
This is the finished product. I really like it much better with out the trim around the brim. I now have a great hat that I can wrap ribbons around to change it. Attach flowers, barrettes, I also found out that I can use my headbands around it. The possibilities are endless! So excited! 
These are another purchase that I made. They are bright pink flats, but the picture doesn't do them any justice. They are Bright BRIGHT neon Pink. I just had to share my lovely shoe find.
The whole point of this is that if your patient, I waited alllll winter long to get these hats, it will pay off. And the other point is that with a little bit of work you can take something ho-hum to Hum-Yes! I'm looking forward to long fun times with my fedora and the shoes... the shoes are pretty distracting. 

EggyMcMuffins

I finally finished scrubbing the muffin tin from my latest endeavor. And as I sit to write about it,  I wondered if it was worth it. I hope my hubby will appreciate my work. I've actually made this before, and for some reason the eggs came out easier the first time. As always-almost anyways- I can thank Pinterest for this make ahead meal. And I took some artistic license with it. The recipe calls to have one egg per muffin space. I cracked a dozen eggs into a bowl and then mixed the eggs with pre-cooked sausage. I scooped the mixture out and into the tins. Cooked at 350* for 20 min. I cooked them and sliced eggs. I also cooked a can of the biscuits. I then had to put everything on hold. 
Baby boy was awake and demanding my attention. Once I had him feed and happy he sat in his high chair and watched me finish the project. I cut the biscuits, place the cheese on, and the egg finishing with the top of the biscuits.
I wrap them in tinfoil and toss them in the freezer-which was annoying side story. I had to clean out the freezer and re-organize before I could get the mcmuffins in to freeze. 
I now have a great little meal to feed to my husband. I love having meals like this set aside, when you have two young children you never know how much sleep you will get in a night. Last night was lacking. 
http://www.macheesmo.com/2010/03/breakfast-sandwiches/

Thursday, May 24, 2012

Quick Calzones

A while back I made some spaghetti complete with meat sauce. After the spaghetti was cooked and eaten, I realized that we had much more sauce then noodles. Unsure what to do with the excess I tossed it in a tuperware container and into the freezer. And, kinda forgot about it until it was menu time.
When I'm putting together my menu there are a few things that I look for. One, i like to have as much of the ingredients present, Two, the list of ingredients must be short and Three, it must be tasty sounding. That one is always a nice little additive. No sense in making a nasty tasting meal.
Cruising through my "Taste of Home,  Dinner on a dime", I came across Quick Calzones.
1Loaf of frozen bread dough (thawed)
1 cup of three-meat sauce
1/4 cup shredded mozzarella cheese (I just sliced mine)
1-2T milk
1 T grated Parmesan Cheese
1/2 t Italian seasoning
I was like um, yes I will do this recipe! It calls for meat sauce, I've got meat sauce I need to use. This will be prefect!
I wrote down the things that I needed and picked it up at the beginning of the month. And I was finally able to make it last night (the 23rd of the month.)
Yesterday morning I pulled out my cheese, meat sauce, and loaf of frozen bread and let them all de-thaw together. I read over the steps and figured it shouldn't take too long. Not too long, just all day. My second born went down around 4 for a nap, hoping to avoid the mad panic of six. I went ahead and made the calzones.
You divided the dough into four equal-ish parts. And roll it out. I recommend being more stingy with the flour. I had troubles getting my dough to stick when I folded it over. Once you get them a nice size, place your cheese, the more the better I discovered, and the meat sauce. Fold it over and pinch the sides together. I ended up pressing them with a fork trying to get them to stay. 
Brush the tops with milk and sprinkle parmesan and the iltalian seasoning over them. Pop them in the oven for 20 min at 350 degrees. And you get the below result. I did the "poping" later. I made them then covered them and left them in the fridge till it was closer to dinner. Essentially avoiding that pivotal time when both boys are awake, demanding and I'm trying to get food for them all. 
I thought this was a perfect meal for our family. Even my  2 year old ate most of his. I even had an extra to send with the hubby to work this morning. Hope you enjoy the ease of this and the taste is fantastic. Thanks again to Taste Of Home for this tasty recipe. It was a hit with us all! 


Wednesday, May 23, 2012

Surprising No-Bakes...

Let me start off with, if I had known how cold it was going to be today, yesterday's no-bakes would have been a bake. And there is a good chance that I will be baking something ANYTHING to help warm the house up. Last night before I headed off to bed I opened my house up. Hoping that we could survive the unusually warm weather the following day. And true to Idaho weather, today's high is a forecast of 56 but the real feel is 53. I will say this for Idaho weather, if you don't like it, wait....it will change.
So back to the no-bakes. I am very fond of baking, not so much of cooking. I would not be able to tell you why I prefer the one to the other, I just do. And when it's hot the last thing I want to do is add to the heat by turning the oven on. So the no bake offers a wonderful option.
The sad thing is since I have moved here there has only been one successful batch of No-bakes, and it was not for lack of trying. Most of the no bakes are little drops of mushy mess. The only one that came out right was a batch that a good friend gave me. Including her recipe + all the ingredients. That batch was tasty, delicious and in cookie form. The rest I would have to scoop up with my fingers and eat quickly before it would drip all over. They tasted okay, but not as good as the actual cookies should be.
Glutton for punishment I decided to try again. I used a recipe off of pinterest.
Easy enough and I had all ingredients. So away I went.
Here is the recipe courtesy of "Lick the Bowl Good"

  • 2 cups sugar
  • 1 stick oleo, margarine or butter (I used butter)
  • 3 Tbsp. cocoa powder
  • 1/2 cup milk
  • 1/2 cup crunchy peanut butter
  • 1 tsp. vanilla extract
  • 3 cups oatmeal (old fashioned rolled oats, not instant)
Mix the sugar, butter, cocoa, and milk in a medium saucepan.* Boil for 1 minute.
Add the peanut butter and vanilla. Mix quickly until peanut butter melts, then add the oatmeal and mix til well blended.
Drop spoonfuls on tin foil, wax paper or parchment. Allow to set and cool completely.

She would place her oats in a bowl then pour the mixture over the oats. I followed suit thinking "It can't hurt!" 
I then dropped them on to wax paper (that I had placed on baking sheets.) And waited. Not patiently I'll admit it. I helped myself to a few mushy soupy cookies. They tasted good. I kept waiting...and waiting...and waiting...
The cookies remained "soupy." sadly disappointed I left the "mess" to be cleaned up later and went on to other things. Like bed. 
And then this morning, Surprise! In place of soupy little mounds, there were actual cookies! Like pick them up, set them down, pile them together, cookies! So when the author says "allow to cool and set completely' she means over night. When you have given up all hope of them ever being cookies, they will overnight become what you want. 

http://lickthebowlgood.blogspot.com/2010/09/summer-and-autumn.html

Tuesday, May 22, 2012

Re-Vamp your Grilled Cheese

No I have not forgotten about this blog, I just got a little bit busy. And I'll be honest, distracted. I usually fluctuate between "utterly obsessed" and "uninterested." And yes I stole that from a pinterest picture, but it describes me so well. So, I am flipping the switch back to "Utterly Obsessed" here we go again. Before the start of every new month I sit down and do our family budget and our menu for the month. I feel as if I'm almost always in a sate of sitting down to do the budget and menu.
Yes it's alot of work, but it's alot of work at one time, the rest of the month is easy breezy. So worth it. And to add some variety to our "Rice and Beans" budget I like to look for new recipes to try. Thanks to Pinterest it's so much fun. Of course this leads to the "Honey pick up a pizza for dinner, I was busy pinning healthy recipes" scenario (yes another theft...)
I stumbled across this recipe and thought it was interesting sounding, a nice variation on a sandwich. I would be able to easily feed myself and the boy off this, and since it had cooked fruit I figured that my husband would be okay "missing out."
You need "sturdy wheat bread", red pear, raspberry jam, cooked bacon, and muenster cheese. I took alot of artistic license with it. 
I used some of my home made white bread that I sliced on the thicker side, to make it "sturdy". Also I have no idea where you could find "muenster cheese" I was unable to find it, so mozzarella stepped in as a replacement. Last change I made was using strawberry jam instead of raspberry, I had sadly just run out of my grandmothers homemade jam. You layer the ingredients on the bread then grill the sandwich. The recipe had an order to it, but I figured there really was no big difference to how I did it. On one slice I layered the mozzarella cheese, on the other slice I spread the strawberry jam, laid the bacon on top of that, and finished with the pears. In my skillet I plopped a little butter in and melted it. Placed the slice with just cheese, in retro-spec I should have done the other one first, it's harder to flip over.Added slice number two, adjust slice number two. And grill.  
Bread, I like, along with strawberry jam, pears and cheese. Bacon made me a bit leery. I am not always sold on bacon. There are people out there who live and die by it, I am not one of them. I usually crunch a half to one whole one and I'm good. Feeling adventurous when I put together the menu is what leads to the "off the beaten path" items for meals.
I made a lunch for my son out of the pieces. He takes apart sandwiches anyways, why bother to make one for him.  He happily munched on all the separate pieces. I watched him eat while my sandwich finished grilling, wondering if he had the right idea.
Taking my sandwich out of the skillet, placing on a plate and sitting with it at the table. I was not sure what I was about to find.
What I found was a surprisingly tasty and very filling dish! All the pieces play well off of each other. No Idea if it would taste better with all the actual ingredients, but I'm fine with it the way it is, I'll keep it. Besides, the hunt for muenster cheese might prove to be more then I would like to do.


Tuesday, May 15, 2012

It's Tasty. It's orange, It's Easy. It's JELLO!

This last Sunday was Mother's day. It was a beautiful day here and other then my husband having to work at the restaurant it was a wonderful day. I celebrated with my family for lunch and my in-laws for dinner. Mother's day present for me? I picture canvas of my son and I walking into the sunset (one that I was also pregnant with son number two), an itunes card, and the fact that I didn't have to cook the whole day. Well minus the jello I made. But I did that the morning before and I would hardly count it as cooking. Very low maintenance and quick. 
This pic is of the ingredients, in case you can't read them all it's One small package of small jello, one coantianer of whip cream (thawed) large container of cottage cheese, small can of crushed pineapple, and one small can of mandrin oranges. Make sure the fruit is drained. 
And this, this is the jello all mixed together. Very tasty, another win for Pinterest! 


LBD- blue not black

Have you ever attempted to find royal blue clothing? It's not really easy. Of course when you are not looking for it then you find it, but when you "Need" to find something that color you can't. I found Bright, topical blue and Navy blue, baby blue, green blue. But no royal blue. You might ask "Why are you trying to find Royal Blue?" Well let me tell you. My younger brother is getting married this summer. The bride and groom requested that we wear Royal blue. Happy to oblige, if I could I set out on my quest. 
I found a beautiful royal blue dress at a certain store (Old navy if you must know) and brought it home. triumphant in my quest, I proudly showed my find to my wonderful husband. He was indifferent. Honestly I was told that it looked like I was wearing a swath of royal blue fabric. Thought I could live with that, it was after all the elusive color I had looked for.
Sheepishly, I found myself back at the same store, with said dress. Returning it. I so seldom have the chance to buy clothing, I will not buy something that my husband doesn't like.
So off on the hunt I went, again. 
I had found directions months ago about how to make an infinity dress. But that was before budgets and baby number two. I forgot, like I so often do now days. I can thank Pinterest for reminding me. And a dear dear friend for pinning the pin.
The bottom of the post has a very helpful site to go to to make your own infinity dress. 
If you are anything but short you will need a butt load of fabric, I'm not joking. That, that picture is of five yards of very stretchy fabric. Tips for picking out fabric; look for a nice stretchy fabric, one with spandex in it, give the raw edges (in the store) a bit of a tug to make sure it won't unravel on you. Once you have spotted your prey, watch it through your camouflage of coupons while you wait for the "right" coupon. I found a 50% off coupon bringing this fabric down drastically! Thank goodness. 
This is the fabric laid out, you can't see the end of it, it just kept going and going down the hall way. This next part is such a pain in the butt.
You will need to cut the circle for your dress. A perfect circle out of slippery, slick, fabric. It can be done, just take your time and go SLOW! I used my tape measure that I stuck a pin through the hole of pinning the tape measure and fabric to the floor. Then using some chalk I made dashes to cut a straight line. 

When cutting the long straps, I recommend a yard stick. Helps to keep the fabric still and the line straight.
These are all the pieces, I have one circle skirt, one waistband and two very long straps. When you sew them together, trust me it will be easier to do the straps then the waist band. Much easier to manage. I ended up with a circle on my skirt (for my waist) much bigger then my actual waist, so I had to gather it into the waist band. I would recommend doing this project with a person who is good at math. I am not, I suck at math. Anything past the 2 grade my kids will be at the mercy of their father. Who is good at math. And if I had been patient I might have been able to avoid the gathering process. 
Also, my waist band was much thicker then the dress made by the other person who made it. But I found that the thicker waist band help to hide the bra. Good thing, yes.
Sew the straps on, then pin the waist band on and sew that on, but leave about half an inch on each side not sewn down to the fabric. Then you can sew your vertical seam, then sew it down to the dress. There was way too much seam ripping going on for my liking. The fabric was slippery and keep slipping around making it very difficult to sew. 
But perseverance paid off. Now I have a lovely royal blue dress that I will be able to wear in a variation of ways the only limit is my imagination!
Go and check out the site for an awesome diagram!  

http://knucklesalad.com/convertible-infinity-dress-how-it-almost-defeated-me-and-what-you-need-to-make-one/

Quick, in the nick of time, iPad headrest mount

A trip looming with a 23 month old and a 4 month old, you could say I'm a bit apprehensive. A year ago the 23 month old traveled well, but that was a year ago... who knows what this trip will be like. And horrors, I'm doing it solo. I'm either brave or out of my mind insane. We will find out which after the trip, or during. Five hours in a car...what can I do to keep at least one of my children happy?...? Well I have this great little device, an iPad, but no way to attach it to the back of a head rest. And have you priced out those things lately? Not cheap.
I am woman, I am resourceful. There must be some easy and simple solution that is cheap. I googled "diy iPad mounts." There were a few options that came up, but none of them "simple" and they all required purchasing things.
Hoping to use what I already had around the house, I set to thinking. And Thinking and thinking, and Thinking. And this is the solution I came up with. Granted it has not had a "test drive" (literally) but when I set the iPad in seemed to hold fairly well. Granted I had these items from one past project and a brother-in-law who gave me the shirt (it was much much to large for him.)
Are you ready for this all too simple project? All you need is a shirt (that is longer then your head rest-you want to be able to tie it) and a plate hanger. Yep that's it. I'm glad that I was able to think of this, because if I came across this on the internet (or Pinterest) I would be doing the V8 head slap. 
You simply cut the bottom of a large, x-large or xx-large shirt, about 6-8 inches or so. Enough to help balance and secure the weight of your device. 

Once you cut the strip, you will need to cut it apart, so that you have a strip of fabric instead of a tube. 
Next, you will go find your victim. A headrest of your choosing. Tie the strip of fabric around the headrest, loosely to start with. Take the plate hanger and slip it between headrest and the fabric. Now you can tighten the heck out of the fabric strip. Make sure you spread the fabric across as much of the headrest as possible. The more fabric touching the more friction involved, the less you have to worry about that very expensive piece of equipment. 
Then you take your device and using the plate holder just slip it into place. Now you have a very easy, inexpensive mount for the long and tedious trips you take with children. Happy traveling! 


Monday, May 14, 2012

Houdini Tortellini Soup

When I first walked in to the house I was met with a smell. It was a gag me and kill me quick smell. Some might not mind it but I was leery of what was meant to be our "dinner."
When I came across the recipe on Pinterest I thought "sweet! a pasta meal that I can make and walk away." As I read the instructions I realized that it was not nearly that simple. If I had read the instructions before I bought the ingredients possibly this dish would have not been made. 
But I had the ingredients, most of them anyways, so I made the dish. 
You make the soupy aspect of this dish then leave it to cook. That was the part that did not smell great. Then an hour to forty-five min later you toss the tortellini in.
The last bit of the dishes cooking life something happen. I have no idea why, or how, but the gagging smell disappiated and a delicious smell came. Magically almost!
I got the recipe from Better Home and Garden, via Pinterest. Here is the recipe... as I used it...

1 envelop of white sauce, 1 cup of veggie broth, 4 cups water, 1/2 cup chopped onion,  1/2 teaspoon dried basil, 1/4 teaspoon salt, 1/4 teaspoon oregano, 7-8 oz of tortellini and 12 oz of evaporated milk. You combine all the ingredients, minus the tortellini and evaporated milk. Cooking them in the crock pot, then one hour to forty-five min before you eat you dump the tortellini and evaporated milk in the pot to cook. That's when it starts to smell nice. 
Now if you go to the website you will see that I left out some things... like the garlic, cayenne and the spinach. I don't like spinach, I hate limp wet spinach. So out it went.
From the smell in our crockpot to the dish on our table, I was very surprised to take the first bite and actually like it!

Sunday, May 13, 2012

A Mother's day Gift

I love being a mother. Having kids is up there in my top 10 list. Yes it's a challenge some times and I would be lying if I say I have never thought about what my life was like before, and missed it. I'm a mother, not a saint. But then they do something sweet like my baby son smile ridiculously big just for me looking at him or my older boy coming with his arms outstretched and saying "Ug, Ug."
And just like that I forget all the turmoil and think, "Awww, I want ten more!"
One fantastic bonus about the kiddos is that I have some pretty awesome built in Mother's day gifts, or in this case Grandmother's gift. As long as I have a hand print or a picture of the boys I'm covered.
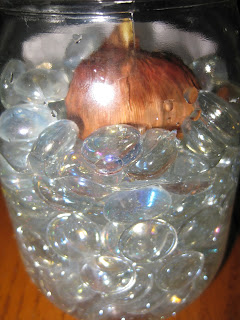
For this year's project you will need  a jar (I used mason jars- found them) some pretty glass rocks, two bulbs, picture (or paint for hand prints) and Mod Podge to paint the pictures to the jars. 
These jars were pretty dirty, so a quick trip through the dishwasher took care of that. You ask why didn't I simply wash them in the sink, by hand. Well, let me tell you. Where I have been able to deal with my deep fear of spiders, I can now kill them, I will still avoid thrusting myself-willingly- into Spider Web situations.  
Then Taking the pictures I mod-podged them on to the jars. I recommend using copy paper for this, or you will not be able to keep the photo paper on. You will just create a gift that will cause annoyance with the picture continually pealing away from the glass. "Thank you Thank you very much for the *ahem* wonderful gift." 
Next take your glass rocks and fill the glass vase half full, or half empty? Then pour some water over the rocks.  
Place the bulb on the rocks and then using the leftover rocks "stabilize" the bulb.  
And here is the finished project. Ready to bloom and bloom and bloom! If it stays watered that is! 

Monday, May 7, 2012

Take Two...

I sat down a few days ago and was going to make a trivet out of all the corks that my husband has been bringing home from his job. By warping wire around the middle I thought I could just coil them together, nope that doesn't work. I'll lay them flat and do a type of weaving with wire, nope that's even worse. Oh! I'll just...forget it! I sat down to be relaxed not to get annoyed and frustrated at a bunch of stupid corks! I put that project on hold and just watch tv instead.
Then late on Saturday night, as I should have been going to bed an idea popped into my head. You know how your brain is tired till your head hits the pillow then you have all those wonderful brilliant ideas come. That was where I was Saturday night, amazingly Sunday morning the idea was still in my head. So I set to work, keeping an eye on the time. I do after all still have church two boys to get ready and a husband to get up.
I sorted through the corks first and picked out all the same corks, won't do to have a mismatched trivet. Don't want things tipping down the road. I then heated up my wonderful glue gun and set to work. I stood at the counter keeping the hot tip and the cord away from my almost two year old. He is quite able to entertain himself and enjoys playing and doing his own thing- minus now where he is sitting in my lap watching me type and drinking lots of water (fun diaper to come.) But you still can't be to safe when heat is involved.
Standing the corks up I started to glue them together, going in a circular pattern. I just kept going and going and going.  
After a bit of time I ended up with the below project. 5 corks across in a hexagon shape. I enjoyed the random purple tops scattered in the trivet. Thinking that this will make a fun project later, possibly write a letter in the corks by using the purple tops. Will be tricky and time consuming and I will need many many more corks.  
Above is the almost finished project, missing something though. Hot glue is incredible and a great solution for simple projects, but it lacks a little permanency when dealing with some projects. This being one of them. 
Using some wire that I have around from previous craft obsessions I warped the corks twice and twisted the ends together. Giving the trivet a lot more stability and a nice touch of class. This step would have been much easier if I had simply waited for my lovely husband to help out. But patience is a work in progress for me and so there for I did it by myself.  
The gluing of this project was easy and you end up with such a fun look afterwards. I look forward to other projects that the corks will inspire! 

Sunday, May 6, 2012

By Starlight

I remember as a teen I bought some glow in the dark plastic stars. My cousin and I then preceded to cover my entire ceiling with them. Jumping up off the bed to stick them, moving chairs, supporting and balancing each other as we accomplished our task. We possibly had a little too much fun and wrote the name of my high school crush in the stars. Possibly. I loved falling asleep under them watching them slowly fade into the darkness of my bedroom while I dreamed by the starlight they left, so very briefly.
I moved out of my back bedroom that had been converted from my dad's old shop room. Making way for my brother who took over the room, but still the stars stayed. He made room for my husband and I to be able to land for a bit, and I was able to show my high school sweet heart proof of my crazy crush. We moved out of that little bedroom and my next brother took hold of it, and the stars remain.
Not for any sentimental reason, mainly because it was time consuming to place them up there, and it will be just as time consuming to remove them. So the stars will keep their nightly watch in the back bedroom and the sister next inline will be able to fall asleep by starlight. 
My son has develop a fond love of "stars" it's the first shape he can recognize and he gets very excited when he finds this shape. I borrowed a metal desk from my parents, to set a fish tank, and inside the drawer was one of the glow in the dark stars. Our boy was over joyed to find that little star. My sister was gracious to give me some of her old stars that she had taken off her ceiling, maybe those stars in the back bedroom won't be there much longer after all.
I rent. I will not take the time to stick a bunch of stars up to only remove in too short a time period, no matter how few they may be. But my son needs to sleep by star light! That's when I came up with this very simple but fun idea. 
All you need is some paper lanterns, above, and some glow in the dark stars, below. Along with a hot glue gun, also below.  
First thing I did was divide the stars up evenly so that I won't end up with one of those awkward looking 30 stars on this one, and 5 on that one. And the last thing I wanted to do was try and peel the stars off, that would lead to ripped lanterns, of which I do not wanna have to pay to replace them. These lanterns were a yard sale find, I paid one buck for three.
I focused mainly on the bottom with a few on the sides and none on the top of the lanterns. They hang above the crib so you don't see the top.

I now have the best of both worlds. Glow in the dark stars to watch at night AND they will not be a huge time steal-er project to take down- nice little plus hot glue sticks a lot better then the weird gummy stuff they give you.
I know it's hard to see the stars, turns out white on white is a tricky thing to see. But I stepped into the closet with the lanterns and my son to show him what they do. The stars looked lovely in their glow-y-ness, but I'm pretty sure the kid had no idea what I was doing. "Crazy women in the closet..."

Saturday, May 5, 2012

Cookies!!!! Give Me cookies!!!

If I've said it once I'm sure it will not be the last time. Betty Crocker's Cook Book is by far my most favorite cook book I own. It has a nice base of recipes. Simple easy to understand. Which is good for myself. I have a basic understanding of my way around the kitchen, but anything more then that I would prefer to have my hand held. Betty Crocker is a great hand holder.
Thank's to Pinterest I am acquiring a better cooking skill, and thanks to my blog I am enjoying this venture.
This cook book has been with me since I got married. I stumbled across it at some yardsale or other. My first cook book of my marriage it has been a very helpful addition. One recipe that I keep using, and I have yet to find one that equals it in taste, the Chocolate Chop Cookie recipe. Normally I toss in chocolate chips, but I am a sucker for vanilla. So this time I made the recipe  I did Vanilla Chips instead. So very very taste I can easily eat the whole batch by myself. I give a few to my son so that I can honestly say, "Why No, I didn't eat them all by myself! My son helped." Although in reality, he maybe relieved me of two. Shhh, our secret.
So with out further Adieu Chocolate Chip Cookies...
1/2 cup granulated sugar (that's white for those of you-like me- struggle with the cooking lingo)
1/2 cup packed brown sugar
1/3 cup soften margarine or butter
1/3 cup shortening
1 egg
1 teaspoon vanilla
1 1/2 cup flour
1/2 tsp salt
1/2 baking soda
1/2 cup nuts (I have never once made a batch of nut cookies- my husband would be most disappointed)
1 package chocolate chips (This works out to 2-3 generous handfuls if you do bulk)
Heat Oven to 350*
Mix ingredients- typically I just go down the list in the order that they are listed, seems to work out well for me. 
Drop dough on to a UN-greased cookie sheet. What ever size you would like. I've done big and I've done little. I like the littler one's better. 
Cook for 8-10 min. Till they are a slight brown.
Start at 8 min and do 1 min increments till you get to the light brown. I do 8.5 and they are nice and soft. 
These are the tasty cookies that I made, they did not last long. They never do in this house. Some day when my sons are grown I would love to have fresh cookies almost every day for them and their friends to come and eat after school.
Some day, but for now I will make the cookies and I will eat the cookies. 

Wednesday, May 2, 2012

Quinn's Dish

A dear friend of mine comes over once a week to hang out and enjoy each other's company. Typically in the afternoon then we will eat dinner together. Taking turns of course for who cooks. We were taught how to take turns. So, this is the dish that she made one of the many times she has cooked for us. And it's tasty.
Fettuccine Carbonara
-cooked pasta enough for four
-1 cup heavy cream
-5 egg yokes
-pepper to taste.
- cook pasta and drain
-mix the heavy cream, 5 egg yokes, and pepper together. And add the egg mixture to the drained pasta
-In a separate pan brown 1lb of sausage (or bacon) then dump in with the pasta mixture. Add 1/2 cup of parmesan cheese.
- set on burner to let thicken.
This is what you end up with, a very easy dish and quite hearty, I might doubt the healthiness of it. But we all die some day right? My friend made this dish over a month ago. I have made it for my family, it is now in my mothers recipe box. And of course it is in my own recipe box to stay.

Marble-toes

I'm a toe painter. I keep trying to paint my finger nails, but after only a few moments of a life as a mom they don't fare well. The beautiful gloss get's quickly lost. I'll stick to having fun with my toe nails and leave my fingers bare. 
A while ago there was a tutorial on how to make tie-dyed nails. They looked so beautiful. But my sister and future sister in law tired. Turns out nail polish and water just make a mess. The "art" you end up with on your nails doesn't make it worth the clean up around the nail.
I found a tutorial online, and I sadly I can not for the life of me find it now. But I will walk you through the process. Very easy and as long as you are careful, clean marbling affect. 
two contrasting nail polishes
and a tooth pick
You will need the items in the above picture.You can do any two colors (Eventually I will try three but for now I do two) your little heart desires. The bigger the contrast the easier to see the marble look. Just keep that in mind. And for the sake of ease, I will show you on a piece of paper. I'm no acrobat after all.  
Before you begin I recommend shaking and opening your nail polish colors first. This is where the "if your careful, clean" part comes in. Do not forget they are open, Do not open them anywhere near children (in fact wait till they are asleep) and Do not go to shake them after they are open. I will not be responsible for the after math of that. 
Paint your nail the base color, the darker color works best for the drops.  
Next drop three dots on to the still wet base.  
Quickly, very quickly using a figure eight motion swirl a tooth in and out of the drops. In all sorts of directions. And that is basically it. Be prepared for this to take awhile if you plan on doing each toe (or finger) nail, since the polish needs to be wet in order for this project to work, you have to do one at a time. 
Here is a picture of my finished Marble nail. I'm a mother of two young boys who will wake up at any moment. I have no time to do each nail. So I just do the big toe. People get the idea. 

Tuesday, May 1, 2012

Rock a bye baby

I am the proud mother of a almost 2 year old and a not quite 4 month old. My older son has yet to figure out how to crawl out of his crib, and that fact makes me stubbornly refuse to give up that sweet sweet savior of my sanity and sleep. My younger son is growing fast. Height and weight, he's packing it on as quickly as I can get it into his mouth. And the little Moses basket I had bought with my first pregnancy was beginning to look littler and littler. So, in come the parents for the save...once again.
This is the cradle that was cut out for me but put together for my brother. My younger three siblings got to use it. I got the cool retro buggy. And you might think that that is sarcasm, but I assure you it is not. I like to be different and to have my own things, even as a baby. But as you can see it is a beautiful cradle, complete with a fantastic foot pedal. But no mattress. I could have done it retro-retro style and acquire some straw for the bed. I was raised on a farm after all. But I decided a mattress of sorts would be best. Less scratchy. 

The cradle is a but smaller then a standard pillow case. Lucky me I had some spare pillowcases laying around- I use pillowcases for my changing table. Amazing how the stores try to "pull one over on you" when babies are involved.Yah, I'm having a baby, I need to SAVE money, not spend it! 
Taking my handy dandy tape measure I measured the inside of the cradle, then sewed the side to match the width. Add a bit extra to the width, Mine ended up a bit small. I also had some batting from an earlier project that bit the dust. Cutting that to fit inside the trimmed down pillowcase. I found that using a yard stick  made getting the batting in much easier. Lay the yard stick over the batting, fold the batting in half and insert into the pillowcase. 
Once you have the batting in and "situated" fold the opening in and sew along the edge. I then began the "quilting" process. I was going to do this really cute cross over pattern just below the pillow of the mattress. Then a diamond pattern.... But my sewing machine had other ideas. It apparently wanted a break. So it sabotaged me by allow the needle to break. My last needle. I had just written "sewing machine needles" on my grocery list. This is as far as I got....
Once I get my needles replaced (in spades) then I will finish this project in proper style. But I figured a four month old does not notice, does not care. They just wanna be cozy and comfy. The mattress accomplishes that fine regardless of the quilting. 

**I'll post the actual finished project when I get it finished!